Thursday, December 25, 2014

SHRIMP FRIED RICE

Today being Christmas, festive mood is in the air and during the festive season people all over the globe can think of only two things......family and food!


When my father was posted in the port town of Paradip -- a major sea port of the country, I had the privilege of studying in.a convent school.  During the Christmas season, we were asked to help our Sisters in decorating the school with Bells, ChristmasTree etc . We also used to take part in carol singing . We were invited to attend the mass on the Christmas eve . It was real fun . Some of my friends were Christians and this acted as a cherry on the icing for me. We friends used to have a great time together in spite of the fact that we belonged to different religions . Unity in diversity. :D
The Sisters used to make so many delicacies like plum cake , idli  ( fermented with coconut water,  fried rice , chicken vindaloo, chocolate cake , fish fry--- to name a few. The Sisters  mostly belonged to Mangalore, a place in Karnataka. Their food had therefore the flavour of Mangalore cuisine . By now it is over two decades that I completed my school. Still during Christmas, I remember my days at Paradip. Fond memories they were ......
I  made shrimp fried rice today for lunch , which I would like to dedicate to my School Sisters. Wish you  Sisters a Merry Christmas !!
Now coming to my recipe for the day ....its a very simple yet tasty wholesome meal .It is shrimp fried rice....
Ingredients -
Shrimps -1 cup ( cleaned and marinated with salt pepper and haldi powder
Steamed rice -2 cups
Onion -finely chopped
Mint leaves - A few
Ginger -1 teaspoon  (Chopped )
Green chillies - 2 ( Grated )
Garlic -2 pods  (Chopped )
Salt - To taste
Haldi powder(turmeric ) -1 teaspoon
Oil - 3 tablespoon

Method -
Heat oil in a wok. Add onion and garlic and saute till the raw smell vanishes .Add ginger , green chillies and shrimps .Add salt to taste and haldi powder. Mix well and cover the wok with the lid .Let the shrimp fry in its own juice .After two minutes,  you need to check whether the shrimps are done or not. When the shrimp is done,  add the steamed rice .Mix well, add mint leaves. Mix well. Serve hot with raita.

                                            **************


Wednesday, December 17, 2014

MIXED VEGETABLES IN COCONUT GRAVY


While watching  a daily soap in the evening, I was cutting some vegetables without deciding on the curry I would cook for dinner. I think I was more into the daily soap :). 
I had vegetables like brinjal, beans, capsicum, bell peppers, carrot and peas .

Daily soap over, I started teaching both my children. The elder one found a chapter in Social Studies difficult. He is more fond of subjects like maths, science, computers .The long and lengthy answers required lot of writing and he finds that tough. Anyways, somehow he understood the chapter and was confident enough for the test exam,  the next day .  

I chanced to look at the clock. It was 6.30 in the evening. It was time to take my younger son for his drawing class ."It was so nice to work rather than become a homemaker," I thought. There was little time to sit and relax. And I rushed with him to the drawing class. Sat there through the class as he won't let me return home without him.

Back home, it was already 7.30 and no time to cook anything fancy ! I had to cook something quick  and tasty . For a moment I even was annoyed with the Queen of daily soaps Ms.Ekta Kapoor..Had she not started this daily soap; I would have been through a well organised cooking by now. 

I took out my pressure cooker and said " boss , now  you alone can help me !" :) I was really thankful to the french physicist Denis Papin who invented pressure cooker in 1679, in an attempt to reduce the cooking time of food. His airtight cooker used steam pressure to raise the water's boiling point, thereby resulting in a much quicker cooking .

I decided on having mixed vegetables with coconut gravy.
Here goes the process of making this easy recipe.
The required ingredients are as follows -

Brinjals - One Cup
Carrot- One cup
Beans -One cup
Capsicum - Half cup
Red bell pepper half cup
Onion- one large (sliced )
Tomato -Two ( Chopped )
Coconut milk - Two hundred ml
Salt -To taste
Turmeric  powder- one tea spoon
Oil -Two table spoon

For the paste  -
Coriander seeds- One tea spoon
poppy seeds -Two tea spoon
Red chilli - 4/5
Peanuts -One tea spoon
Ginger and garlic paste -Two tea spoon
Grated coconut -One table spoon
Jeera -One tea spoon

Method-
  • Heat one table spoon  oil in a pan. Add all the ingredients of the paste masala and fry for one to  two minutes. The nice aroma from the mixture would signal the optimal frying. Grind the mixture with a little water to a fine paste .Keep aside .
  • In the pressure cooker  heat one table spoon of oil. Add onion, saute for a minute.  Add the paste which you have kept aside. Mix the masala and saute for a few seconds . Add all the vegetables, salt to taste and haldi powder and give a gentle mix  .
  • Cover the lid and let the vegetables cook for a while in the juices secreted from the vegetables . You should make sure that the vegetables are coated with the paste properly. After the vegetables are half done , add the chopped tomatoes .Mix well .
  • Add two hundred ml of coconut milk and mix well . Close the lid of the pressure cooker .Switch off the stove after you get two whistles . Keep it aside and open the lid only after the pressure becomes normal..
  • Serve hot with steamed white rice.
                                                           **********************


Sunday, December 7, 2014

VEGETABLE KEBAB


"When did you start blogging ?" "When did you start cooking?" These were some of the questions put to me when my new friends had come over for tea to my place last week.....These questions set me walking, down the memory lane ...."I and kitchen"???? ....a sharp contrast-- during that point of time ! I started working soon after college . I had little time for the kitchen any day. Thereby my transition from an HR professional to a food blogger took a long long time --- nearly a decade .:D
After shifting to Hyderabad, I have joined a power yoga class . The class is a very intense one . :( The yoga teacher ensures  we are absolutely drained out after each session........we all make faces but we all know, he does it for our good . :)
Again let me come back to my friends....thanks to the yoga class, I have been able to make some good friends ...:) I had invited some of my friends for tea. It was time to decide the menu for the party. I settled for a few items including vegetables kebab. Kebab making is a tedious task . Takes nearly an hour to make the kebabs.  Another 15 minutes to shallow fry them ....:)  Made up my mind and kebabs were done for my friends.
Now time to share the recipe with the readers :)..


Ingredients -
Mixed vegetables -1cup ( Grated )
Cashew nuts -7-8( Crushed )
Raisins -7 -8 (Chopped )
Salt -To taste
Chilli powder - To taste
Garam masala -1 tea spoon
Maida -1 table spoon
Breadcrumbs -1cup
Oil -To shallow fry and to make the mixture
Onion and capsicum - Chopped for garnishing


Method -

Heat one tablespoon of oil in a wok . Add the chopped cashew nuts and raisins . Fry for a few seconds, you need to see that they don't burn. Add the grated vegetables and saute for a minute. Add seasonings, garam masala , chilli powder .Mix well and cover it with a lid .Let it cook in a slow flame till the vegetables are cooked .You need to mix in between so that it doesn't stick to the bottom of the wok. After the vegetables are done, add maida or plain flour and mix well. Keep the mixture aside , let it cool down completely.
Take breadcrumbs in a plate,  form  ball-size mixture in your palm. Press them lightly to make flat shaped,  like tikkis. Refrigerate for an hour .Take the formed tikkis out of the refrigerator. Take 2 tablespoons of oil in a frying pan,  slide the tikkis slowly into the oil , fry on both sides . Let each one
become brown on both sides. Serve hot with tomato ketchup or any sauce of your choice . Enjoy !!!


Saturday, November 29, 2014

BHAPA DOI


Yesterday was my  wedding anniversary.  :) I thought of making a different but traditional dessert for the occasion . My husband wanted an Indian dessert .We all started to think for the right item . My elder son suggested gajar halwa, my younger one, as usual, wanted chocolate ice-cream.  I had little time to debate on. I had to finalise something soon , Why not "bhapa doi", I blurted out, spontaneously . ;) My husband looked at me confused. "wao !! what is that'? he said.....I explained,  it's a traditional recipe of curd from West Bengal.  My husband had lived in Kolkota, during the initial days of his career . He knew a little bit about Bengali cuisine ."Fine", he said. That settled the issue--  Bhapa Doi for today's dessert.

 Bengali cuisine is known for its subtle flavours and its has a huge spread of desserts and confectioneries too. Mustard oil is prominently used while making non vegetarian items and vegetables in this region. Daily meal is usually partial to fish with vegetables and lentils served with rice.

Now something about today's recipe. Bhapa means steam-- it could be applied to preparing  fish, meat or vegetables with spices. Bhapa Doi is basically a kind of Indian cheese cake. Now how to make bhapa doi ??? How can you steam curd ???? I am sure you must be wondering  as well.  Don't you worry ...I will tell you a very easy way to prepare this .It is a very simple and delicious recipe . The recipe is as follows -

The ingredients needed are -
Curd-1cup
Milk -1cup
Condensed milk -1cup
Dry fruits of your choice - Sliced thinly for garnishing

Method -
1)Beat the curd nicely with a beater so that no lumps are formed. Add milk and condensed milk to the beaten curd. Mix well .
2)Take ramekin molds, pour the curd mixture into them . Garnish with sliced dry fruits of your choice. Cover  the molds with aluminium foil.
3)In a steamer, heat water , put the ramekin molds in the steamer . Steam them for 20 minutes or till a toothpick inserted comes out clean .
4)Cool them completely and store them in the refrigerator.
5)Serve chilled.
6)Enjoy!
*******


Saturday, November 22, 2014

MUTTON BIRIYANI


Married to an IT professional for the past 13 years , I have had the opportunity to travel to various cities in India and  different parts of the World . I have been living in the "City of Pearls" for the past 9 months now  . The Charminar, Golconda Fort , Hussain Sagar ,  Nagarjuna Sagar dam are some of the places one needs to visit when one is in this city . 
As a food blogger, however, my interest will be on the cuisines of Telangana and Andhra Pradesh (Hyderabad will be the capital of both the states for a decade now ). Biriyani is woven into the life of Hyderabad. You get the best Biriyanis here . During Eid you will find biriyani, haleem, and sewayeyan in every nook and corner of Hyderabad. 
Hyderabadi cuisine is basically a meat and rice oriented cuisine, it contains a variety of ingredients that are commonly used, ranging from vegetables, spices, meats, flavors to fruits . In the city of Hyderabad and its suburb, use of flavors, tomato and tamarind are the most common ingredients. Meat (such as mutton and chicken) dishes are prepared by the technique of dum—(sealing the dish with dough and gently simmering its ingredients over a slow fire to facilitate absorption of aromatic spices.).The Nizams served some 26 varieties of biriyanis for their guests .
Today is  "Sunday" and  the weather is perfect  to relish home made Mutton biriyani ! Here goes the Biriyani, the way I prepare my perfect Sunday meal for my family . You may as well try this to make a memorable and prefect Sunday lunch for your family and loved ones !

Ingredients-
Mutton: 1kg
Basmati rice: 500 gm
Cumin (jeera): 1 tsp
Whole garam masala:  2 tbsp
Garam masala powder:   2 tsp
Garlic-ginger paste: 2 tbsp
Golden-fried sliced onions: 2 cups
Mint leaves: 1 bunch
Curd: 2 cups
Turmeric powder: 1 pinch
Saffron: 1 pinch
Coriander leaves: 1 bunch
Salt: As per taste
Kashmiri red chilli powder: 1 tbsp
Oil: 5 tbsp

Procedure -


For the marination of mutton 

Wash mutton, pat dry and add garam masala, salt, ginger-garlic paste, red chilli paste, and 2 cups of curd. Mix well and store it in a clean container and keep it in the refrigerator to marinate overnight.

Method
1)Boil the water, add oil, 1/2 tea spoon jeera, salt and half-cook the rice.
2) Fry thinly sliced onions until golden brown. Add a pinch of salt . Add 1/3 of the golden-brown onion to the mutton marination and rest keep aside.
3)Now in a handi (deep pan) add the marinated mutton in the bottom and top it  with half cooked rice, add mint leaves, coriander leaves and top it up with fried onions. In a separate bowl, add some warm milk to soak saffron. Once the colour comes out from the saffron , add it to the handi.
4)Cover the handi or pan with a airtight lid or close the lid with dough on the edges. Cook for 45 minutes. To ensure that the  biriyani does not burn from beneath , place the handi over a tawa - Skillet.
5)Serve hot with raita and mirchi ka salan.


                                                             *********************


Wednesday, November 19, 2014

PAPAYA AND ALOO CURRY


Green papaya is a very useful fruit, full of essential nutrients and enzymes to promote digestive health.
Since enzyme levels decline as the fruit ripens, raw papaya is preferred  to make the best use of all of its natural enzymatic qualities.


Yesterday morning when I was cooking lunch for my family , I noticed a green big papaya in my refrigerator. Should I make use of it? I thought. None in the  family has ever liked eating papaya at all. For that matter, not even the elders . They know all the benefits of the vegetable; but when it comes to papaya ...its always a NO!  :D 
Anyways, I thought of taking a chance and made it  in a different manner. May be they will like it. :)


Ingredients -
Papaya-1 medium sized, cut into cubes
Potato- 1small,boiled, and cut into cubes
Onion-1  small one,  chopped
Garlic- 1 tea spoon chopped
Green chillies -1 chopped
Pudina leaves- A few
Salt -To taste
Turmeric powder- 1/2 tea spoon
Oil- 2 tablespoon

Method-
In a non-stick pan ,heat oil, add chopped onion and garlic.Saute for a few seconds till the garlic and onion are done properly and have no raw smell. Add papaya cubes, salt and turmeric powder and mix well. Cover with the lid and let the papaya cook on low flame till it becomes tender . When the papayas are done ,add potato pieces ,tomato ,salt to taste . Add pudina leaves and 1/2 cup of water. Cover the lid and let it simmer on slow flame for five minutes. Serve it hot with parathas .Enjoy !

To continue with what happened next -

I made the papaya and alloo curry in the process described above and you will not believe , all had it.  Even my five year old son, said "badhiya heyichi , eyeta kana? "( What is this ,it is tasty ) I smiled :)

You also make the curry exactly the way I have described , and , I am sure, you will love to have a green papaya in your refrigerator always.  Happy cooking .


Thursday, November 13, 2014

CHEESY BESSAN CHILLA WITH ONION.


Children's Day is recognized on various days in many places around the world, to honor children  globally. It was first proclaimed by the World Conference for the Wellbeing of Children in 1925 .
Universal Children's Day takes place annually on November 20. First proclaimed by the United Nations General Assembly in 1954, it was established to encourage all countries to institute a day, firstly to promote mutual exchange and understanding among children and secondly to initiate action to benefit and promote the welfare of the world's children. Children's day in India is celebrated on Pandit Nehru's birthday as a day of fun and frolic, a celebration of childhood and Nehru's love for them .   
Today is 14th November and to mark this occasion, I present this simple but tasty recipe for children . I usually make this for my boys. They love it!!
I am sure the children of my viewers would also love this. This is a very healthy and  tasty dish .  Here goes the recipe....


Ingredients -
Bessan -1cup
Hing (asefotida )-A pinch
Kasoori methi -1 tea spoon
Salt - To taste
Onion - Sliced 1/2 cup
Grated cheese -As required
Oil- As required 
Water -To make the bessan batter

Method-
Take bassan in a bowl. Add salt to taste  , hing, and kasoori methi . Add water slowly and make a smooth batter and take care that no lumps are formed. The batter should have the right consistency  and should not be watery . However, it should be of pouring consistency . Heat a frying pan , take a ladleful of batter and spread on the pan.

The Picture on top has been taken while the chilla is on the pan 

 
 Don't make the chilla very thin . It should be medium thick. Add sliced onion over the chilla .Take oil in a teaspoon and spread it around the side of the chilla. Turn the chilla . Add oil on the sides . Let the onion turn a little brown. After it is done , remove it on to a plate. Sprinkle shredded cheese over the chilla when it is still hot. Give it to your children , they will relish !!

Picture below has been taken after the chilla is done.


P.S...You may even add tomatoes with onion .


Tuesday, November 11, 2014

CHEESECORN BALLS

Winter has sent in . During this season some hot cheesy is a good bet as snacks for children and the elders. In a winter afternoon, we were all sitting dull and gloomy, staring at the sky. It was raining outside  and was cold .It was a Sunday !!! I looked at the clock; it struck 3. I got up and went into the kitchen . Opened the fridge to figure out if everything was there what I required for my recipe. Slowly but surely I arranged everything on a plate. Hurray  !!I said to myself and started my preparation. Here is how i made it -
Ingredients -
Cheese -1cup ( Grated ) 
Capsicum -1/4th cup 
Sweetcorn -1/2cup
Chilli powder -To taste
Oregano -1/4 tea spoon 
Pepper powder -1/4tea spoon 
Salt -To taste 
Potato -1 small (boiled and mashed )
Oil -For frying

For the outer covering -
Maida- For coating
Water - 1/4 cup
Breadcrumbs -1 cup


Method-
In a bowl take the grated cheese , mashed potato, corn , capsicum. Add salt to taste, chilli powder to taste , pepper powder and Oregano.
Mix together well . Make small balls and keep aside. In another bowl make a paste of maida with water. In a plate take 4 to 5 tablespoon of maida in one side and breadcrumbs on the other side.
Take a ball , roll it on the dry maida, then on the maida paste and then over the breadcrumbs. Repeat this process till all the balls are rolled on the breadcrumbs. Now refrigerate them
for 15 minutes . When you have to fry the balls , take them out from the  refrigerator. Heat oil and slowly fry the balls till golden brown colour. Serve hot with tomato ketchup .Enjoy !

ONION AND TOMATO CHUTNEY


Ingedients

Onions - ( Chopped )
Tomato-2 (Chopped)
Coconut-1/2 Cup ( Grated)
Garlic pods - 4 ( Crushed )
Red chillies-6
Green chillies-2
Oil- 2 table spoons
Urad dal -1 tea spoon

For the tempering-
Mustard seeds -1 teaspoon
Curry leaves- 6-7
Red chilli-1

Method-
Heat oil in a frying pan. Add urad dal ,onion ,garlic, red chillies and green chillies .Add a pinch of salt. Sauté for a minute or  till onion turns brown. Add tomatoes and cover the lid till they are done. .Keep aside the mixture. Let it cool down completely. Grind into a fine paste with  grated coconut and a little water. Heat one teaspoon oil in a pan and add the tempering ingredients. Saute for a few seconds. Add the tempering on the paste. Adjust salt to your taste. Mix well and enjoy the chutney with dosa, idili or pakodas.

Thursday, September 4, 2014

TAWA FRY POMFRET


With a coastline of 480km,  innumerable ponds and many rivers, availability of fish in the state has always been comfortable and made people of Odisha  fond of fish . Fish has always been cooked and served in many forms.  This recipe of mine is a simple one; very convenient and easy. I have chosen pomfret which has a few bones and makes it a favourite with the children. You can, however,  take any fish of your choice.
Here goes the method....happy cooking !


Ingredients -
Pomfret -4 pcs (cut into half)
Oil- 2 table-spoon
Dry spices for marination-
Salt -To taste
Turmeric(haladi powder)- 1 tea-spoon
Red chilli powder - To taste
Ginger and garlic paste- 1tea-spoon
Coriander powder-1tea-spoon


Method -
Marinate the pieces of pomfret with all the dry spices. Keep aside for 20 minutes. Take a non stick pan and add oil. Heat the oil and simmer the flame. Add the marinated pomfret pieces. It will take 7 to 8 minutes to fry the fish on both the sides. The raw smell of ginger garlic should completely vanish. When the fish is well cooked you will get a nice aroma . Serve hot with rice and tadka wali dal. Bon appe'tit !


Wednesday, August 20, 2014

PENNE PASTA IN SCHEZWAN SAUCE

 
Pasta is at the centre-stage of the traditional Italian cuisine. There are a lot of varieties of pastas which are these days available in Indian market. The varieties available are long, short, minute pastas (used for soups), egg pasta and fresh pasta. In India we have a misconception that pastas are made from flour(maida). Pasta is actually  made from Durum wheat flour.The commonly used pasta are the short ones. To name a few, they are penne, fusili, farfalle. I have used here penne pasta in my recipe, but you may use any kind of pasta of your choice.
Schezwan sauce  originated in the Sichuan province in southwestern China. It has a bold flavor, particularly the pungency and spiciness resulting from liberal use of garlic and chilli peppers give it the unique flavour.

My latest recipe is a fusion of Italian cuisine and Chinese cuisine. I have added only vegetables here; but you may also add any non veg item of your choice to this recipe.
Here is the recipe and happy cooking ... :)

Ingredients-
Penne pasta- 1.5 cups
Vegetables - 2 cups(Carrots, beans and capsicum all sliced )
Onion- 1 medium (sliced)
Schezwan sauce- 2 table spoons 

Method-
Boil the pasta as per the instructions in the packet. Keep aside. Heat oil in a wok. Add onion and saute for a minute; when the onion are soft, add the vegetables. Add a pinch of salt and saute the vegetables in high flame(Saute till the vegetables are just done.,ie they are neither half cooked nor overcooked ). Add the boiled pasta. Add the schezwan sauce and mix well. You may taste at this point of time and adjust the seasoning according to your taste. Bon appe'tit !!! 

Tuesday, August 12, 2014

Lauki ki sabjee ( Bottle gourd curry)


These days people of various age groups are conscious about their diet and prefer low calorie food. This is a good sign in spite of the fact that the "fast food" industry is showing a booming business. You need to be very particular with what you eat. Exercise also plays a vital role in keeping you in shape.The saying holds true here , "you are what you eat".
I should tell you about a low calorie recipe---  a very simple lauki ki sabjee. Lauki, known as  bottle gourd, is extremely low in fat content.

Ingredients-
Bottle gourd or lauki-1 medium (cut into medium size cubes)
Onion -1 medium (sliced)
Tomato-1 small (chopped)
Green chillies-2 (whole)
Turmeric (haladi) powder -1 pinch
Water-1/2cup (You can even adjust the water quantity according to your taste )
Pepper powder-1tea spoon or to taste
Salt - To taste
Cumin powder, coriander powder and red crushed chilli powder -To garnish


Method-
Take bottle gourd, green chillies , onion and tomato in a saucepan. Add water , salt to taste ,pepper powder and a pinch of turmeric powder.Simmer the flame and let the vegetables cook till tender.Remove from the stove and garnish it with cumin, coriander and red crushed chilli powder. Serve hot with roti or rice . Enjoy !!


Saturday, August 2, 2014

Thai stir fry vegetables


After relocating to Hyderabad my family has taken a fancy to Thai cuisine. To meet their urge for Thai food ,I have started trying my hand on the same.The favourite is ofcourse Jasmine rice with Thai vegetable green  curry. I shall soon post Thai vegetable green curry but before that, to introduce myself and my viewers  to this cuisine, I tried a simple but tasty dish ,ie Thai stir fry vegetables. It goes well with noodles or our age old  roti .... :D

Ingredients-
Cabbage -1cup ( Chopped length wise)
Brinjal-1 cup (Chopped length wise)
Capsicum-1/2 cup (Chopped length wise)
Basil leaves-1cup ( Only the leaves)
Mushrooms-1/2 cup ( Chopped length wise )
Onion small -1 ( Chopped length wise )
Garlic pods- 4 ( Crushed )
Tobassco sauce-1 table spoon
Pepper powder-1 tablespoon or to taste
Salt -To taste
Vinegar-1tea spoon
Oil- 1 table spoon

In a wok heat oil, add onion and garlic. Stir it for a while till the raw smell of garlic vanishes.Onion shouldn't be brown but just tender. Add cabbage and mushrooms. Fry till tender ( flame should be high and you need to attend to the curry throughout . Otherwise it might get burnt). Add brinjal,  fry till done.Add capsicum and fry till done.Add salt to taste, tobassco sauce, vinegar and pepper powder. Mix well . Add the basil leaves, just give a toss and serve hot. It is different and tasty too !


Wednesday, July 30, 2014

Kukuda Panikoili


Chicken is known as "Kukuda " in Odiya. As I belong to a family of civil servants ,I have travelled all over Odissa ,even to the interior places. Panikoili is the name of a place at the meeting point of the National Highway 5 (Kolkota- Chennai ) and National Highway 215 towards Kendujhar.During my many journeys in childhood on this route I would feel inquisitive about a few road -side eateries the place has and think whether they would be serving the travellers a fabulous" kukuda " curry cooked in Odiya style.This recipe is a tribute to that place.

Ingredients-
Kukuda/Chicken -1kg (cut into medium pcs)
Salt-To taste
Jeera ( cumin seeds) -1tea spoon 
Haldi(Turmeric) -1tea spoon
Dhaniya (Coriander) powder-2 tea spoon
Chilli powder-2 tea spoon
Curry leaves/Bhurshanga pattra- 7-8 leaaves
Onion-3 big (Chopped)
Tomato-4 big (Chopped)
Ginger paste-1tea spoon
Garlic paste-1 tea spoon
Green chillis-  2(Chopped)
Tej pattra (Bay leaf)-1
Water-2 Cups(Boiled)
Potato-1 cup (Fried)
Oil- 2 table spoon

Method-
Heat oil in a kadhai .Add the tej pattra. Add jeera  and add onion.  Fry till they turn golden brown in colour. Add garlic and ginger paste. Saute till the raw smell goes from the ginger and garlic. Add tomatoes and saute till oil separates .Add curry leaves. Add kukuda ,add salt to taste and haldi powder. Mix together and cover the kadhai. In the meanwhile slice a large potato and fry with a little salt.
 After water leaves from the kukuda, let it dry completely .(Be careful at this point. Dont leave the kadhai unattended ,it may burn from the bottom.)Add dhaniya powder, chillie powder .Add 2 cups of water (Boiled) and mix well.Add the fried potatoes .Let it boil for 2 minutes. You can adjust the consistency of the gravy according to your taste.Serve hot with rice or roti .


Monday, July 21, 2014

Masala Parantha


Parantha is a flat bread that originated in the Indian subcontinent. Parantha is an amalgamation of the words parat and atta which literally means layers of cooked dough. 

My children usually love the stuffed paranthas. This time I tried to make plain parantha but with a twist. I was a bit apprehensive but surprisingly both of them relished this masala parantha! Here goes the recipe-

Ingredients-
For the dough
Atta (Flour)- 1 cup
Salt- to taste
Turmeric powder- a pinch
Sambar powder- 1/4 teaspoon
Asafoetida- a pinch
Oil- 1 tablespoon
Water-To knead the dough

For cooking 
Oil or Ghee- for cooking

Method-
In a large bowl mix atta (flour), salt, turmeric powder, sambar powder, asafoetida and oil. Add the required amount of water needed to make the dough soft. Keep the dough aside for 30 minutes. Roll the dough into small balls and then flatten them with your palms. Toss them over atta and then roll into circles. In the mean while heat the tawa or skillet. Lower the flame and place the rolled parantha. After a few seconds small air pockets will form. Flip the parantha onto the other side. Apply oil or ghee and again flip the parantha to the other side again. Apply ghee or oil. Serve hot with any curry of your choice. You can even serve this masala parantha with raita of your choice.
Enjoy!!!!!!!

Wednesday, July 16, 2014

Chocolate pudding


This is a very tasty treat for your children. They can have it anytime!! Here goes the recipe-

Ingredients-
Chocolate powder- 1/2 cup
Cornstarch- 1/4 cup
Salt- 1 tea spoon
Butter- 2 table spoon
Milk- 4 cups
Vanilla extract- 2 tea spoon
Cherries-For garnishing


Method-
Mix together cornstarch, chocolate powder,salt and milk in a  saucepan.Bring to boil . Keep stirring so that no lumps are formed.After you get the right consistency, switch off the flame.Keep aside the saucepan .Add butter and vanilla extract. Mix well.Pour it into individual glasses .Decorate with cherries and serve chilled(Please dont keep in the ice box to set the pudding ). Enjoy!

Wednesday, June 11, 2014

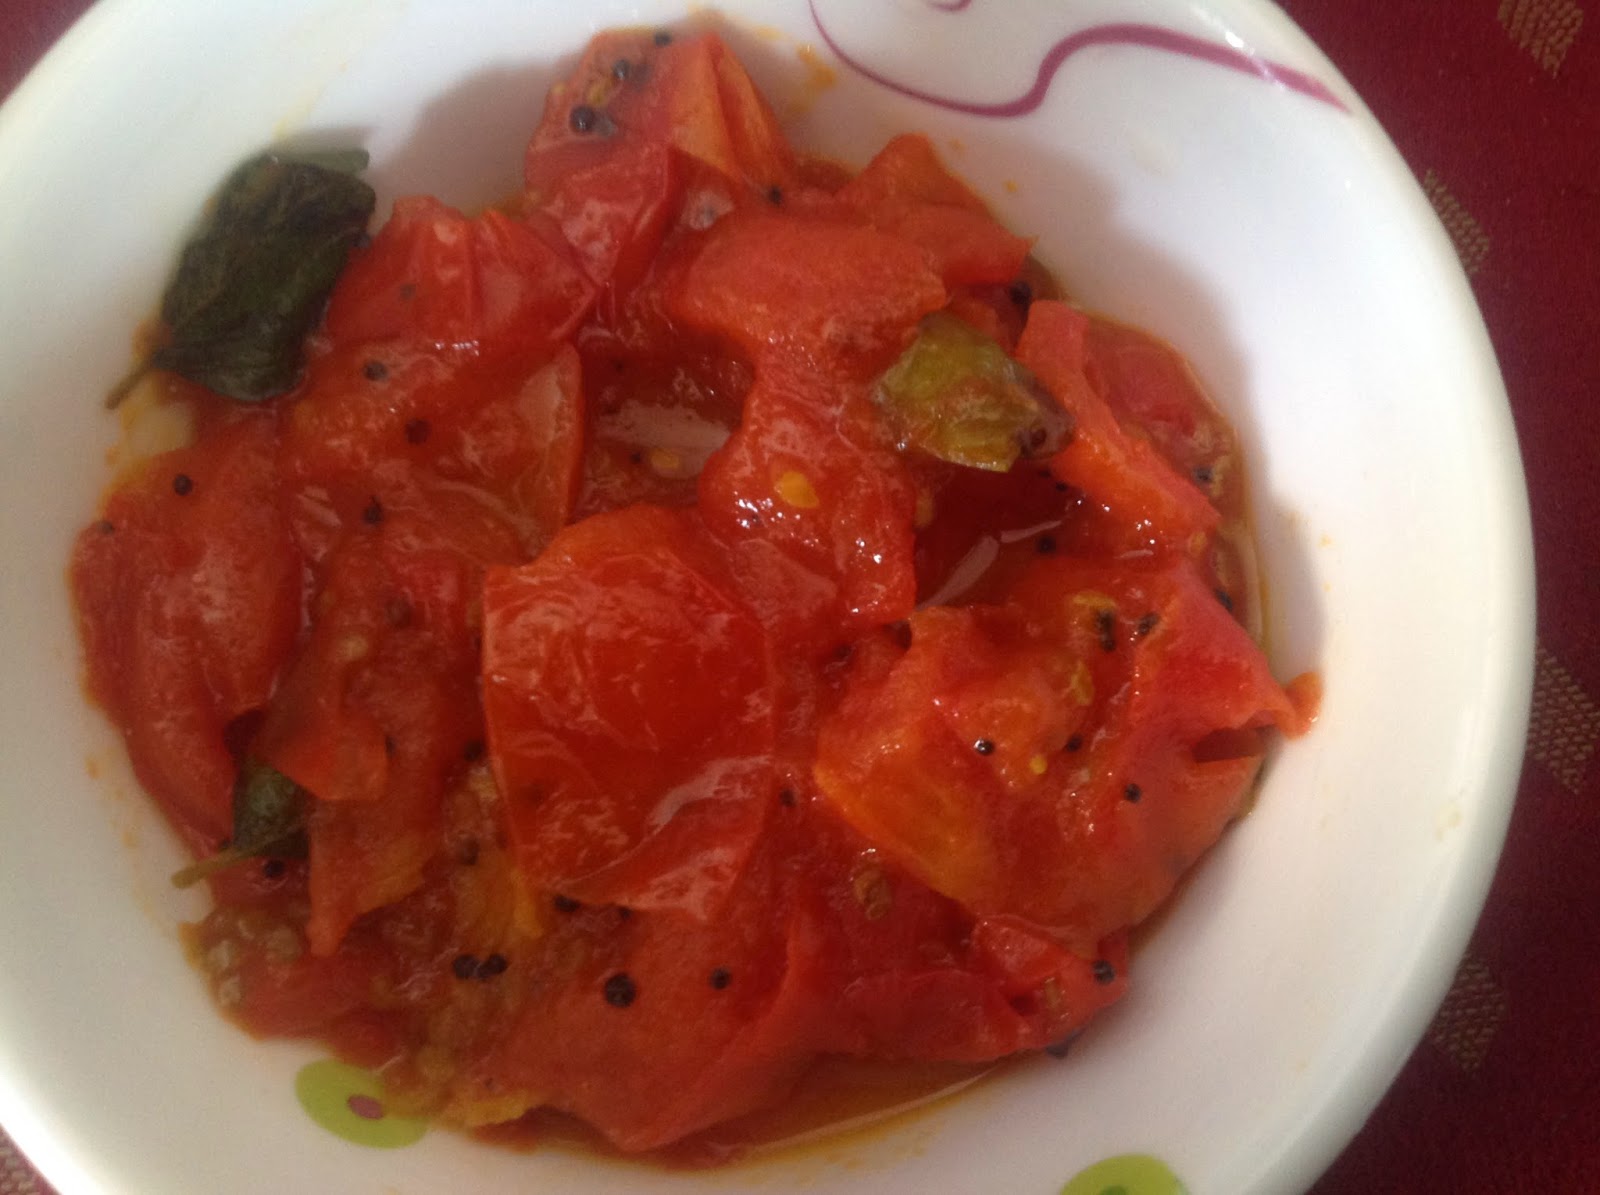
Tomato khatta ( tomato chutney -- odia style)


This is a very simple and tasty preparation of tomato-- khatta(chutney), made in my state of Odisha. Out of the 56 food items offered to Lord Jagannath daily ,this khatta is also offered to  Him. Thereby this item is very dear to all Odiyas. The non use of onion and garlic makes this recipe even more easy and simple.
Today when I was thinking about what I should  make for my husband's lunch box ,I thought of making this, which is his favourite, and, spring a surprise in him ! :D. Here goes the recipe, enjoy and happy cooking. 

Ingredients -
Tomato -4 ( chopped)
Ginger -1/2 inch (crushed)
Oil-1 tbsp
Mustard seed -1 tspn
Sugar - 2 tbspn or to taste
Salt- To taste
Asefotida - A pinch
Green chilli -1 (chopped )
Curry leaves-4-5
Dates (khajur)-- 4/5 pieces
Kismis-- 5/6
Cardamom seeds-- a few

Method -
Heat oil in a pan, add asefotida and mustard seeds. Let it splutter, add green chilli ,ginger and saute for a minute or two. Add curry leaves ,chopped tomato pieces and saute .Add salt, sugar to taste and mix well. Cover the lid, till water oozes out from the tomatoes, then simmer the flame. Let the water evaporate slowly ,thereby making the tomato pieces soft .After water dries, mix the khatta well and serve with rice. You may add a few dates, kismis and cardamom seeds along with sugar.


Saturday, June 7, 2014

Vegetable upma


Already a bit late for your Breakfast and you are anxious to reach office. In such a situation, you may not be inclined  to have your regular cereals .Want something Indian? Here is a simple and delicious recipe which has the freshness  of vegetables and is even tasty ! Vegetable upma is the one for you. Here goes the recipe.

Ingredients -
Sujji ( Rawa)-1 cup
Mix vegetables -1/2 cup
Onion-1 small chopped
Oil or ghee -1 tbspoon
Mustard seed -1 tspn
Curry leaves -6-7 leaves
Urad dal-1 tspn
Salt-To taste


Method-
Heat a kadhai . Simmer the flame , add sujii and fry till golden brown. Keep aside . Heat oil in a pan, add mustard seeds, urad dal, curry leaves. Sauté for a minute. Add onion , sauté till brown . Add vegetables , add salt to tastes. Sauté till the vegetables are done. Add 2.5 cups of water . Let it boil . Add fried suji and mix well. Garnish with dhaniya pata( coriander leaves ). Serve  hot with any chutney of your choice.

Saturday, May 31, 2014

MANGO ICECREAM


Summer season and ice-cream go hand in hand.Children like all varieties of ice cream . Both my sons are extremely fond of chocolate flavour. I tried to give their tongue a twist by making mango ice-cream at home. Surprisingly both of them liked it. Here goes the recipe for all ice-cream lovers to beat the heat and enjoy the flavour of mango.


Ingredients-
Mango -1 .5cup (chopped)
Fresh cream- 1cup (U can also use canned cream )
Milk- 1.5cup
Milk powder-1.5cup
Sugar- 6 table spoon or to taste 


Method-
Blend together all the ingredients in a blender . Pour the mixture  into a container and refrigerate for two hours . Remove the half done ice cream from the refrigerator and blend it again.  By doing this we make the mixture free of  ice crystals get a smooth mixture. Put it back and let it set for 3-4 hours. After it is set, you can serve it as such or can garnish it with dry fruits of your choice. I have garnished it with kishmish (raisins). Enjoy !

Monday, May 26, 2014

LEMON RICE ( ODIA STYLE)

I bring this time a very simple rice item from my state ,Odisha .This is in variance with the "lemon rice" made in southern states of  India. You may try this recipe. Feel free to post comments and suggestions. Wish you happy cooking!! 

Ingredients-

Steamed white rice-  4 cups
Ghee- 4  tbspn
Lemon juice -  From 3 lemons 
Salt -To taste 
Asefotida- 1/2 tspn


Method-
Make steamed rice and keep aside. Add ghee to rice. In a bowl mix lemon juice , salt, asefotida. Add the lemon mixture to the rice. Mix well and serve it with Dalama .

Wednesday, May 21, 2014

ALU GOBHI CURRY (WITHOUT ONION AND GARLIC)

Hi friends,
 I am extremely sorry for a long absence, caused due to relocation. We shifted from Bangalore and recreating the 'home' in a "house" at Hyderabad kept the housewife in me awfully occupied. Hope you would understand. :)

My latest recipe is a cauliflower and aloo recipe without onion or garlic. This makes the item eminently suitable for days of "fasting" and "puja" .

Ingredients -
Cauliflower( gobhi)-2 cups
Aloo ( potato) -1 cup
Salt -To taste
Haldi ( turmeric ) powder -1/2 tspn
Oil-3 tbspoon


Grind the following items:
Tomatoes -2 large
Ginger -1 tb spoon ( crushed)
Green chillies -2 ( crushed )
Khuskhus ( poppy seeds)-2tbspoon


Method -
Clean the cauliflower  and cut the florets into medium size . Cut one large potato into medium sized pieces .
Heat oil in a pan, add the cauliflower florets and potato. Add salt to taste, haldi powder and sauté for a few minutes. Add half a cup of water and cover the lid. After five minutes add the ground masala (tomato, ginger etc) and mix with the vegetables properly. If required you may add a little water incase you like more gravy. Cover the lid and cook for five more  minutes or till the curry is done. Serve hot with paratha or puri. Enjoy!